When you first access an email account through a desktop most of the customers would use and email application just like “Outlook” or “Thunderbird”. In order for you to use your email with these applications you need to set it up. With this guide, I will show you step by step how to set it up for you.
HOW TO START
1/ Please log into your client area.
2/ At the top of the client area, where the blue bar runs across, click into “Services” -> “My Services”
3/ Click into your designated Hosting Plan.
4/ Click into cPanel (Top-left hand corner).
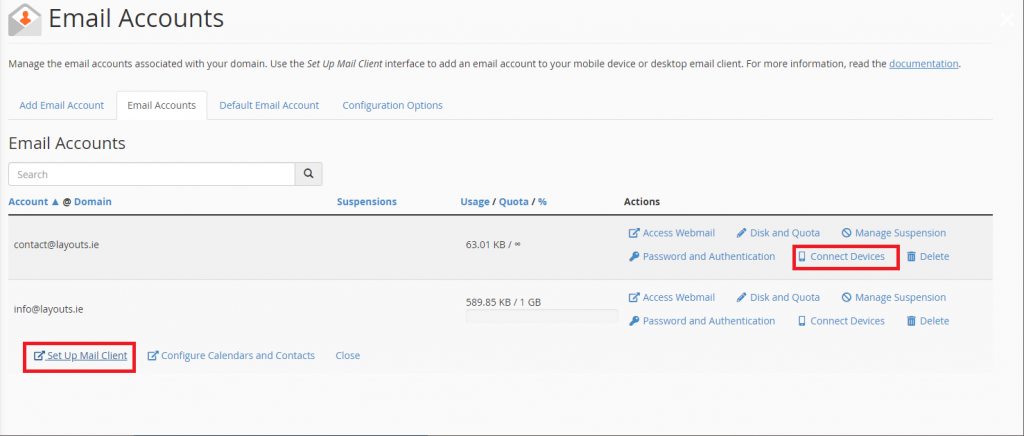
5/ Go to Email Accounts (Click the email accounts icon in the icon menu).
At this stage you should see your email accounts, unless you have no email accounts then you can create one from there on. When you find the email account you wish to connect to the email app, click “Connect Devices”, followed by “Set Up Mail Client”.
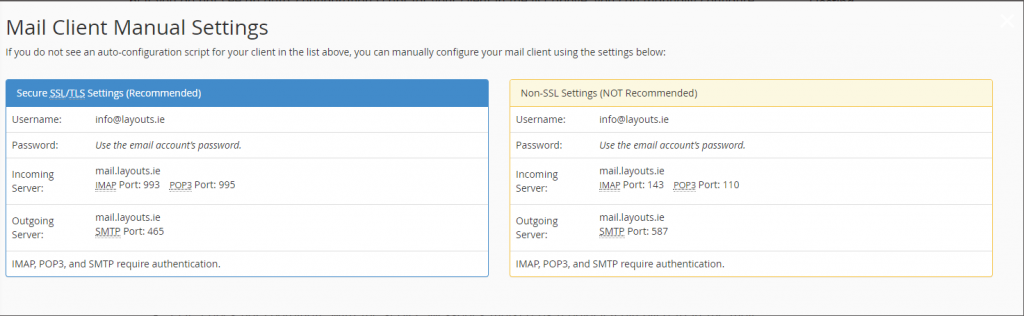
This should bring you into a page with “Mail Client Manual Settings”. You should have two boxes, one in Blue and the other one in Orange. The blue one should have the header “Secure SSL/TLS Settings (Recommended)”. For the set up we will be using the details in this box.
SOME IMPORTANT NOTES BEFORE WE BEGIN
IMAP email access coordinates between the server and your mail application. Messages that have been read/deleted/replied to will show up as such, both on the server and in the mail application.
POP3 does not coordinate with the server. Messages marked as read/deleted/replied to in the mail application will not show up as such on the server. This means that future mail downloads with POP3 will show all messages as unread.
Outgoing mail is sent using SMTP.
We recommend using POP3 over SSL/TLS or IMAP over SSL/TLS since they provide increased security for your interactions with the remote mail server.
Important: This only applies to customers hosted on cPanel.
SECURE OR NOT SECURE?
Secure SSL/TLS settings are recommended, but if the verification with Outlook isn’t successful, please use the not recommended settings.
HOW DO I ENABLE SMTP AUTHENTICATION?
An example: Microsoft Outlook® 2016 (PC)
From the “File” menu, choose “Account Settings”, click once and then click onto “Server Settings”.
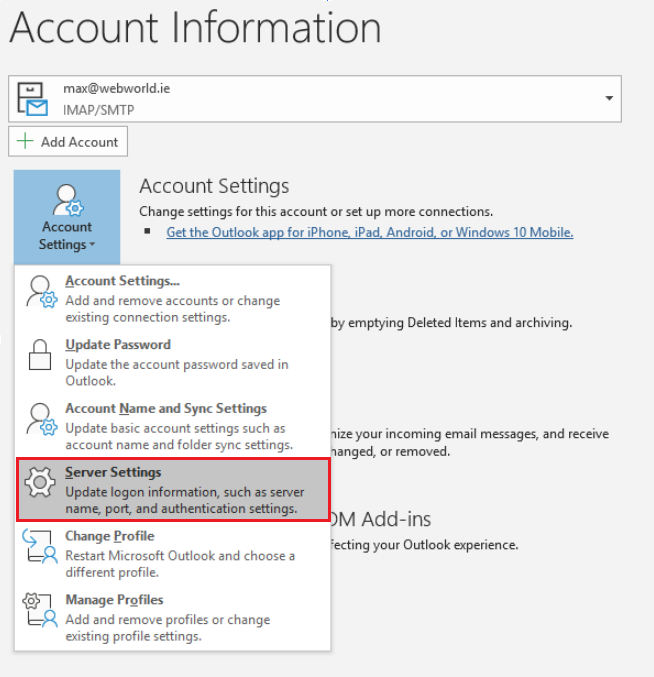
Click “Outgoing mail” in blue font and a menu should appear.
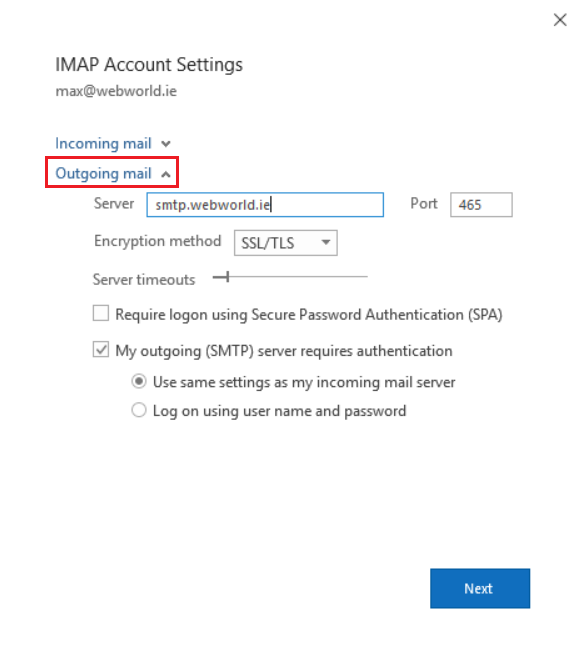
Make sure that “My outgoing (SMTP) server requires authentication” box is ticked like in the picture above. Also be sure that the “Server” is the same as the one that was given to you in the Blue box at the beginning of this tutorial, you can find this box in cPanel as mentioned previously. Make sure that the “Port” is also the same as the one in the Blue box.